Throttle Body Cleaning
2004 Dodge Ram 5.7 Liter - 80,0000 Miles
The general concept will likely apply to any late model DC vehicle
Difficulty level: Easy - Moderate Approximate Time Required: 2 Hours Optional Parts: Intake Air Temperature Sensor (IAT), PCV Valve
Tools Required:
(I happen to have an
aftermarket CAI. If you have the Stock HEMI breather hat, you will need
the necessary tools to remove it as well)
- #2 Flathead Screwdriver
- 1/4" Rachet
- 1/4" extension
- 8mm socket (1/4)
- 5/16th Socket (1/4) or equivalent Nut-driver
- 3 Cans of Brake Cleaner (DO NOT USE Throttle Body Cleaner!!!!!!!!!!)
- Several Clean Shop Towels (Lint Free)
- 1 Toothbrush or similar sized non-abrasive scrub brush
Special Note:
Do NOT force the throttle body open. It is electronically controlled. Additionally, if you have
ever experienced spontaneously erratic throttle jerking, stalling while
driving, etc, that seems to just show up for no reason and completely
solve itself after a restart, Try this... If you have experienced this,
you will have likely also gotten the following DTC:
We will be intimately cleaning the
throttle body, that on this particular truck is actuated via Electronic
Throttle Control (Drive by Wire). EXTREME CARE must be taken to avoid
damaging any electronics, sensors, etc. This isnt meant to scare you,
just to warn you. As you will see, this is very easy to do if you are
well armed with cleaner and know how to use a screw driver.
Step 1: Determining what you will need to remove the Intake
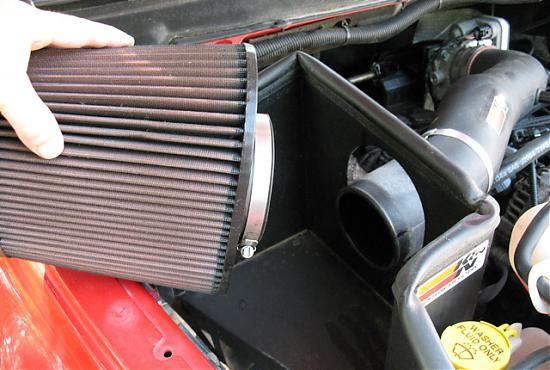
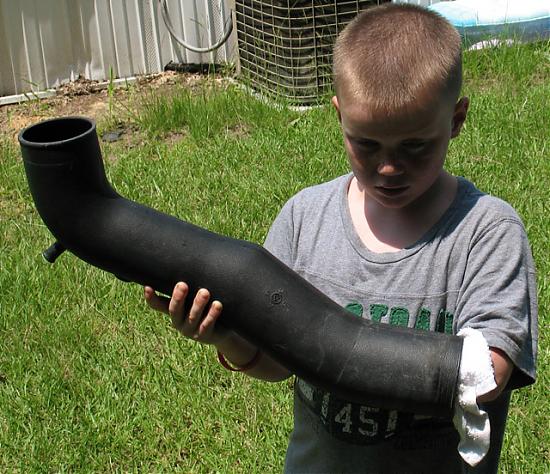
Take a minute to thoroughly look over your intake system. Make note of all your sensors, Wires, retention brackets, etc, and make certain you have the appropriate tools. In My case, I have a K&N CAI as shown here. Pretty much all I needed to remove the CAI was a Flat Head screw driver and a 5/16th socket periodically.
Step 2: Removing the Air Filter
In my case, I simply removed the K&N Filter Clamp with the 5/16th socket and slid the Filter element Off of the CAI tube, and set it aside on a clean surface
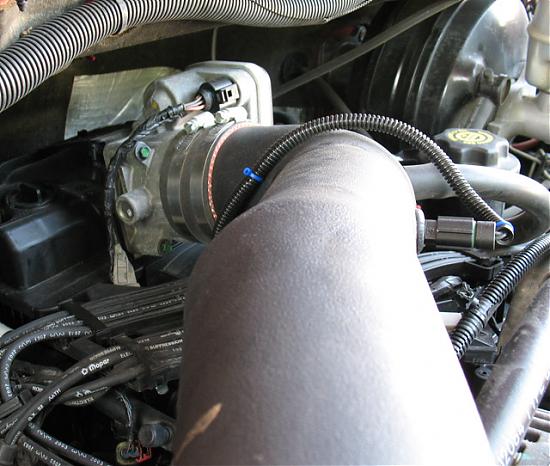
Step 3: Removing the CAI Tube From Throttle Body
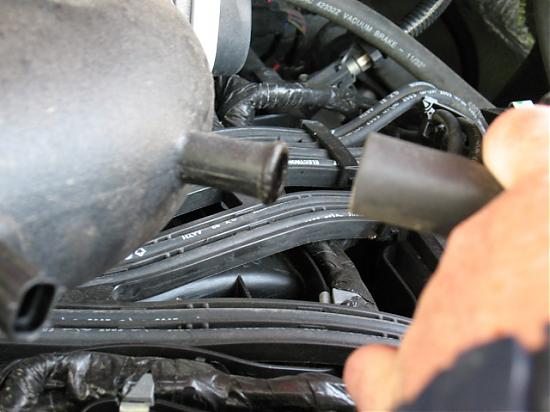
Once again, This is where the "How-To:" will vary from one application to another. Use common sense and determine what steps will be necessary to remove enough of the air-box system so that you have easy access to the throttle body.
Here you can see, once again, I simply removed the connecting clamps that hold the plastic CAI tube to the forward opening of the Throttle Body.
BEFORE you go yanking the top of your engine apart. Make note of a couple of connectors you need to remove to avoid damage.
FIRST (in my case) was the easiest. I simply used a flathead screwdriver to "break the seal" of a Vacuum line attached to my CAI and was able to pull it free with very little effort.
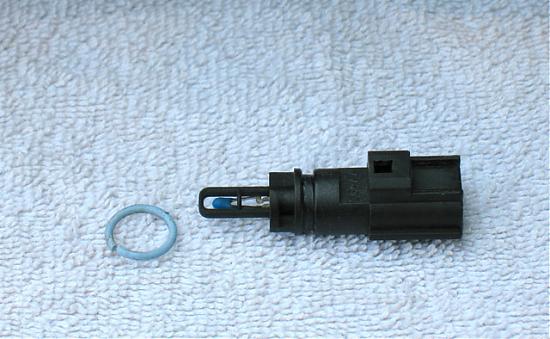
The next thing to watch out for is the Intake Air Temperature Sensor, Commonly referred to as the IAT. Special care should be taken because this sensor is VERY fragile.
In My case, and in most others, you will probably not have to physically remove this sensor from your CAI Tube / Hemi Hat. You will likely be able to simply unplug it.
(***NOTE: If you are using Nicks =Air=Ram=> Power Wire, go ahead and remove it completely now)
If you have ever worked on anything with a motor, you should be able to figure this out. Depress the Locking key and wiggle the IAT Sensor harness plug from the sensor
Go ahead and take a second to look closely and make sure everything is dsconnected and the entire intake system free.
***NOTE: If you have loosened all the bolts and left them in their proper holes, PLEASE go ahead and take them ALL out before you attempt to pull the intake system off the top of the engine. THE LAST THING you want is to drop a nut or bolt into the throttle body / Intake.
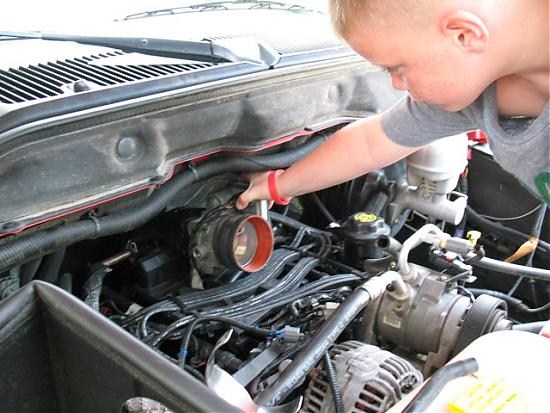
Now, gently remove the remainder of your intake. It would be a good idea to have a partner watching closely as you do this because forgotten items still attached will quickly be noticed by that extra pair of eyes.
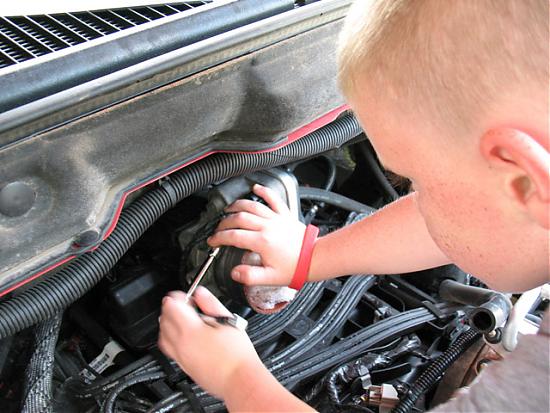
In my case, I employed the services of my 8 Year old son Aaron.
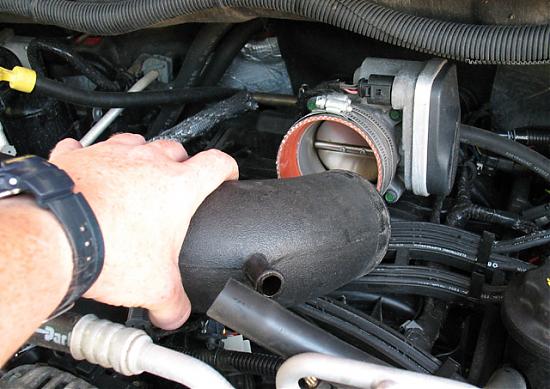
Step 4: Removing the Throttle Body
Call me Paranoid, but I have had to pull an intake manifold NUMEROUS times because that "One tiny piece" of something or the other managed to slip out of my hand and into the engine.
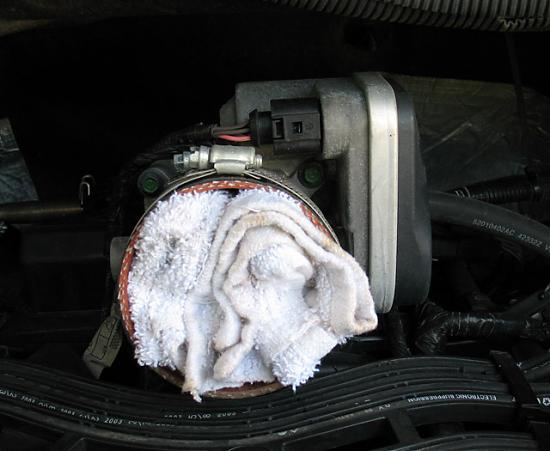
Do yourself a HUGE favor and take a lint free towel, fold it up, and cram it into the T-body opening to prevent this.
Now, before anyone flames me, These particular Terry Cloth towels are usually heavily lint-laden. HOWEVER, I have washed these shop towels NUMEROUS times and I assure you, they are as lint free as they come after 30 washings.
I would recommend driving up to PetBoys and buying some of those old "Cloth diapers", but I didnt happen to have any.
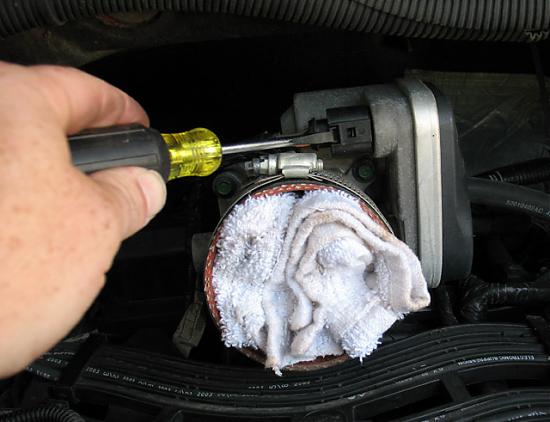
Once the Throttle Body opening is secured, Go ahead and look around your work area and secure all loose dangling harness connectors that we have removed to this point. Once we start the next step, your gonna need all of your hands and those loose dangling wires just get in the way.
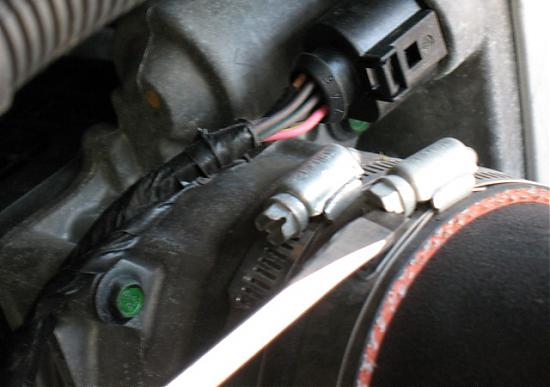
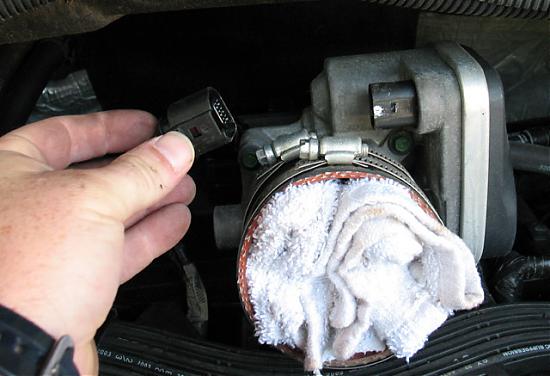
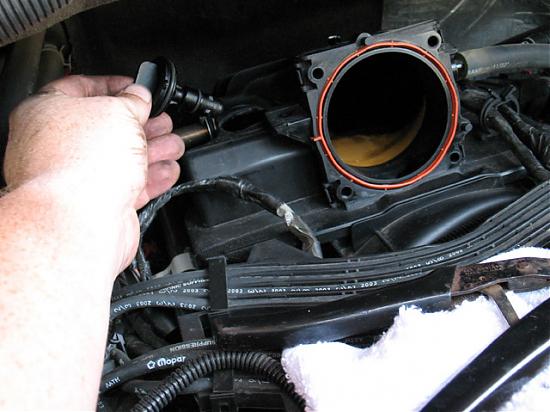
If your Throttle Body is a "Drive By Wire system, you will find somewhere, a harness plug that supplies current for the motor and other essential signals passed from the computer tot he T-Body.
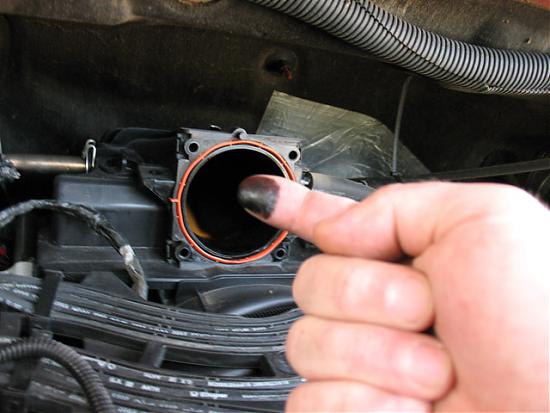
On the 04 and like HEMI's, this plug is located on top, in the front of the T-Body as shown here.
***NOTE: This connector doesn't work like ones you may be used to. you DO NOT push the tab to remove the plug, You will use a screw driver to pull the tab slightly away from the connector (to the rear of the plug) and this will unlock it, allowing you to remove the T-Body harness plug.
Again, Make sure you tuck the Harness Connector out of the way.
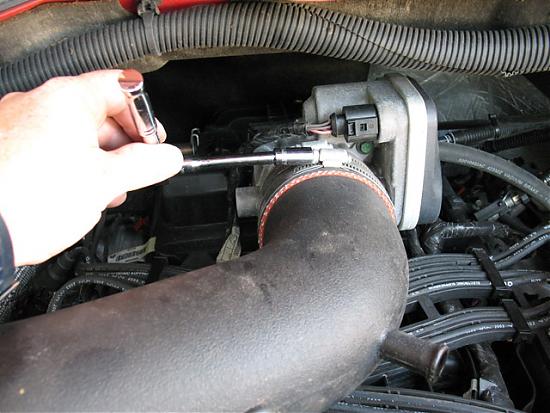
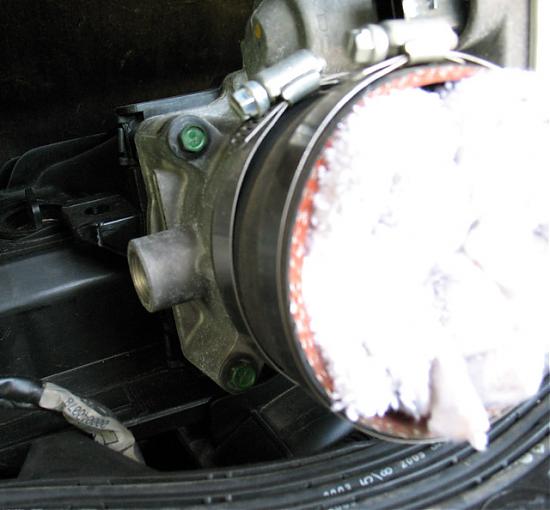
The Next step is to identify the Bolts we need to remove to physically take the throttle body OFF of the intake manifold.
On The HEMI, You will fine VERY easily which they are. There are four 8mm bolts located at each corner of the T-Body and they face forward. You cant miss them. They have been painted GREEN:
Using a 1/4" Rachet, attach a 6" extension and an 8mm Socket.
Loosen AND REMOVE the bolts one at a time using a criss-cross pattern. Top-Right, Bottom-Left, Top-Left, Bottom-Right.
These Intakes are plastic and you want to keep the torque stress on the intake as even as possible to avoid any possibility of over stressing one particular area, resulting in a possible crack in the intake.
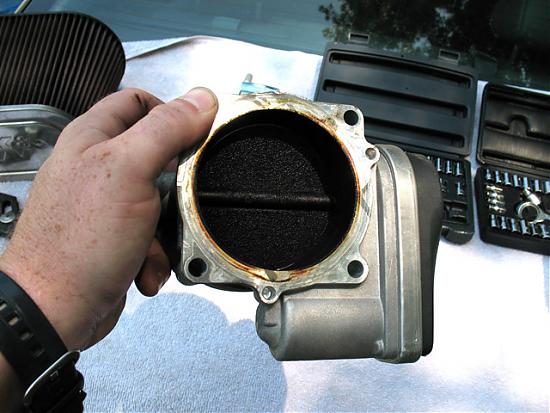
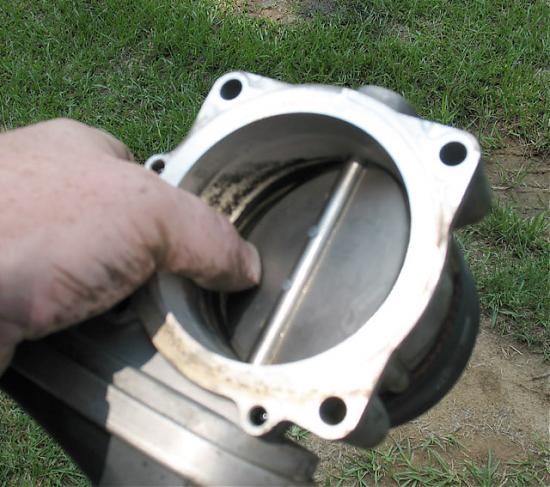
Once you have all four bolts removed, the throttle body will literally fall into your hand:
WHO THE **** Rhino-Lined the BACK SIDE OF MY THROTTLE BODY!?!?!?!
Also notice the Coking found in the Intake Manifold. We will address this later.
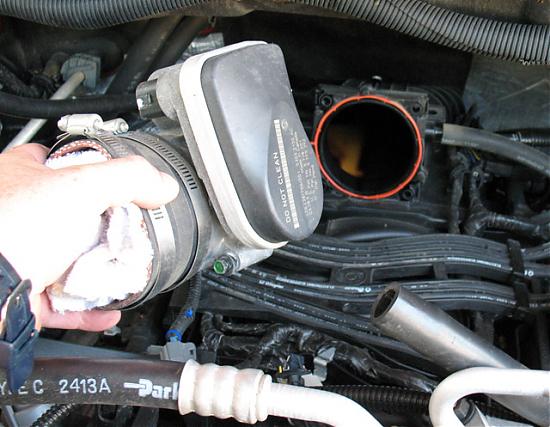
DO NOT SPRAY ANYTHING into the intake manifold. If you do, when you start your truck, It will Blow the Intake manifold OFF and into the next Zip Code.
Step 6: Cleaning the Throttle Body
Now that we have a couple cold beers in us and are done freaking out. Its time to do what we set out to do... CLEAN the nasty SOB.
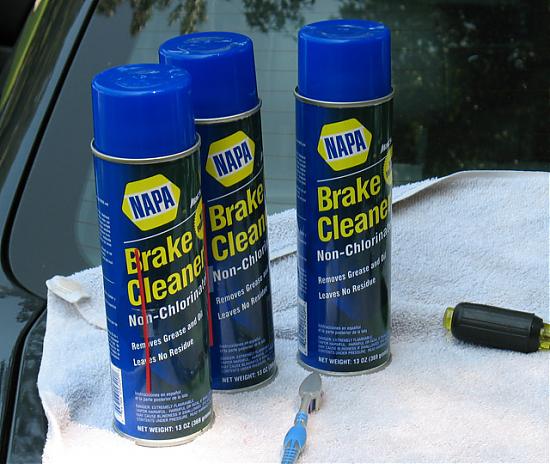
For this, USE BRAKE CLEANER. Im sure we could start a completely new thread debating on what works best, but this is what I used. Good Ol Napa Brake Cleaner.
Once again, DO NOT USE THROTTLE BODY CLEANER! Not even the MOPAR BRAND. Based on the TSB that I did this after, even THEY say to use BRAKE CLEANER ONLY because it evaporates fast, and wont damage the sensitive sensors and electronics on board the T-Body
Do yourself a HUGE favor and grab 4 cans. I used three completely and a 4th would have been nice.
Also Get a Tooth brush handy because you will need it, I assure you!
Last but most important, DO NOT ATTEMPT THIS WITHOUT SAFETY GLASSES. I PROMISE YOU, there is NO WAY your going to clean this thing without inadvertently reverse blasting yourself in the eyeball... and yes, I speak from experience, and THAT $HIT BURNS!!!!!!!
The first thing to remember before we get to blasting away is this:
Gravity is not just a good idea, IT'S THE LAW
1. Now, Grab the T-Body and hold it with actuator motor UP so the cleaner has less chance of soaking the electronics.
2. Hold the T-Body as far away from your body as possible and start blasting. The majority of the Coking will wash right away. After one can of blasting on the dirty side, here is what mine looked like:
Dont fret. By now you have seen that Brake cleaner is some SERIOUSLY mean $hit. The Coking should be stripping off and pouring out of the T-body with every squirt. Dont be scared. Pretend your Blasting the 4 inches of caked mud off of your truck after a mud trip.
When you can see that your spraying is no longer doing much Good, Its time to get the brush out...
Spray a little, Brush a little, Spray a little, Brush a little.
I have heard that you DO NOT want to press open the butterfly valve. Personally, I threw caution to the wind and pushed it almost fully open and using spraying and brushing, cleaned it spotless. The Butterfly is spring loaded and will close back just fine. Keep at it until it is clean...
Once your done, allow it to sit and dry. REMEMBER, Keep the Motor Side of the TB facing UP at all time. Better to be safe than sorry.
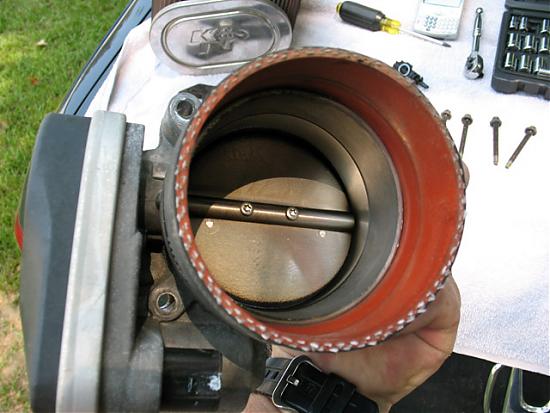
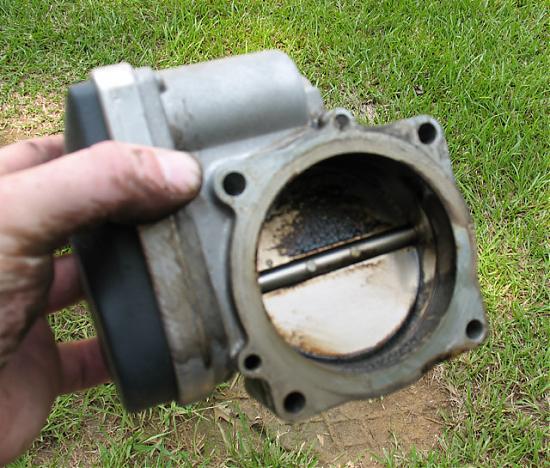
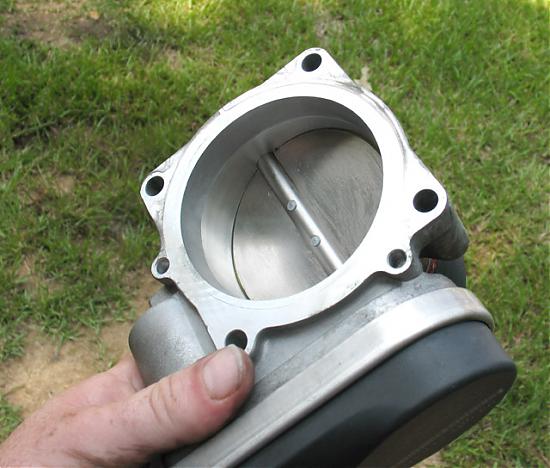
Once your finished, it should look like this....
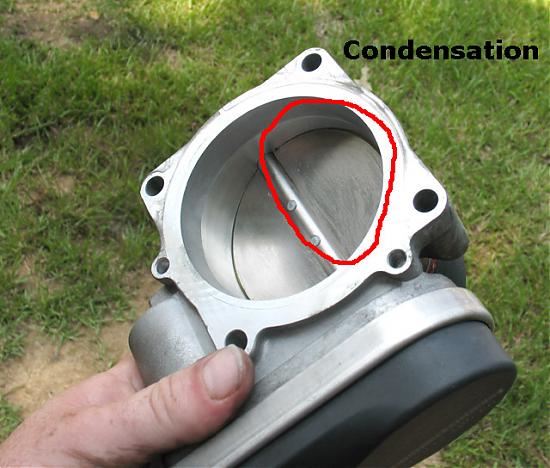
In case you didnt catch it in the picture above. I wanted to point out something that I noticed.
IF YOU LIVE IN THE SOUTH PAY ATTENTION!!!!!
Notice here... See the odd looking pattern on the butterfly? At first glance it would look like scuffs... Its not.. That is CONDENSATION. After a 15 minute soak down session with COLD ASS brake cleaner, the Ambient HUMID air is condensating on the metal surface. MAKE SURE you keep an eye on this. Until the TB reaches ambient air temp, you will want to keep drying it to avoid excess moisture in the TB.
Step 7: MORE CLEANING!
While we have everything torn apart, Lets take the opportunity to clean EVERYTHING. As bad as that T-Body looked, common sense would tell us everything ELSE involved has to be JUST as dirty.
1. With a lint free towel. SOAK the PISS out of it, and CAREFULLY and GENTLY clean as much of the Intake opening as you can.
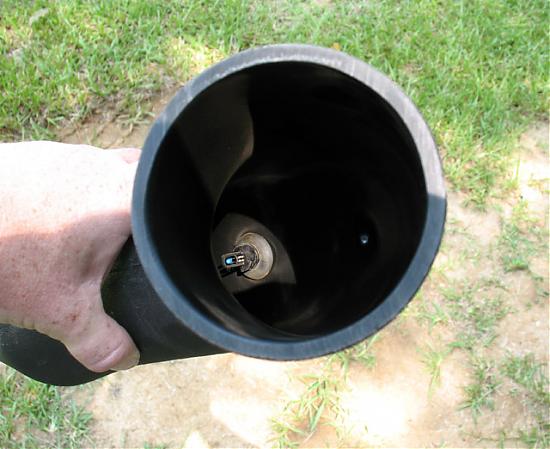
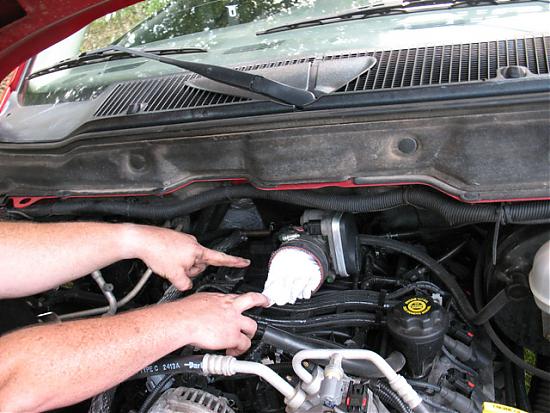
2. I also wanted to clean my Intake Tube. Note here, that the IAT sensor is still installed. GENTLY remove the IAT....
Many have said not to spray the IAT sensor, and truthfully, for under $20 you should go ahead and replace it, but I decided to give it a quick blast and clean it.
After I removed and cleaned it, It was time for Step Number 8!!!
Step 8: Train the NEWEST Mopar Gear Head!!!!
Meet Aaron! While I sit back and sip on barley-pops, Im going to let him take over on re-assembly.
First step... Clean the SNOT out of the CAI Tube. Blast a little Brake inside, Swab it out well with a towel...
Once again, You should probably just go ahead and replace the PCV Valve while your in here, but I decided to try to "Refurbish it" by cleaning it as well. It worked like a charm! The Kid is learning!
Step 9: Aaron Reassembles!
As anyone would expect, Simply repeat the process in the reverse order.
First, Secure your Throttle Body by placing the clean lint free towel into the openeing.
Next Align the Throttle body onto the Intake Manifold and start the two top bolts. once these are aligned, Aaron says its much easier to get the bottom ones in.
As you tighten, remember to Cross tighten to ensure equal pressure on the Intake Manifold opening. tighten diagonally.
Next, Connect the Throttle Body Wiring harness as Aaron shows you here.
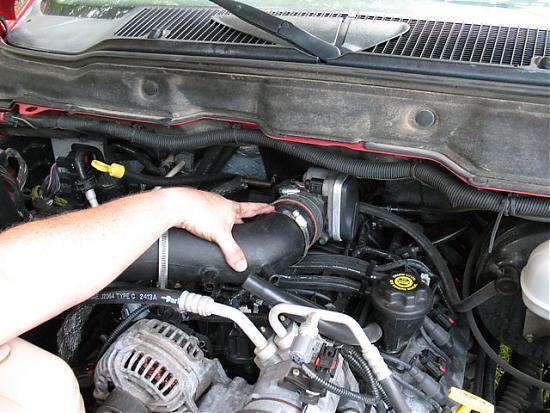
Next, Tighten the CAI (Throttle Body Side) Clamp....
Since he OBVIOUSLY has it under control, Im going to grab another beer!
VERY IMPORTANT... And I QUOTE... "Dad, before we put the tube back on, dont we need to take the towel out of that thing"...
DO NOT FORGET!
ALMOST THERE!
Next reinstall the Intake System. In my case, Aaron simply reinstalled the CAI in reverse order. Once its all back secure, Its time to reset the computer!
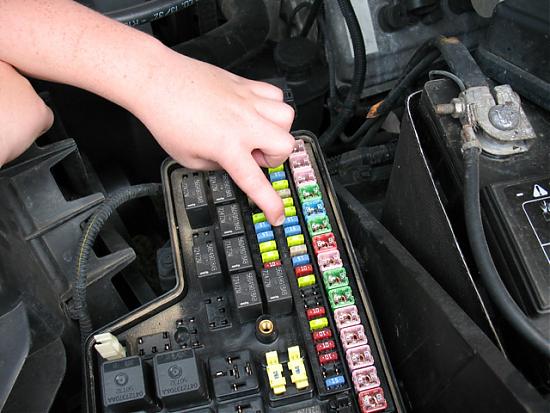
Step 10: Resetting The PCM
With everything complete, Remove the Fuse Panel Cover and Locate Fuse #23
(***NOTE: We are doing this on a 2004 Dodge Ram. Your Fuse location and Number may be different!!!!)
1. Pull the Fuse
2. Jump in the truck and click the key to the "ON" position
3. After the normal chimes cease, advance the key to the START position and wait for two chimes. After the Two Chimes, turn the Key to OFF possition
4. Reinsert the Fuse and Crank the truck. (DO NOT be alarmed if it takes a second for the starter to engage immediately after resetting the computer, that is normal)
THATS IT! You're Done! I must thank my son, Aaron, for his contribution to this Writeup. It really is special when you tackle something like this yourself with your kid and when it all works out, he gives you the "We DID IT DAD!!"
And with that, Aaron gives this project TWO-THUMBS UP!!!!
SO EASY....AN EIGHT YEAR OLD CAN DO IT!!!